In the process of cleaning off the strut to be bottom painted during our
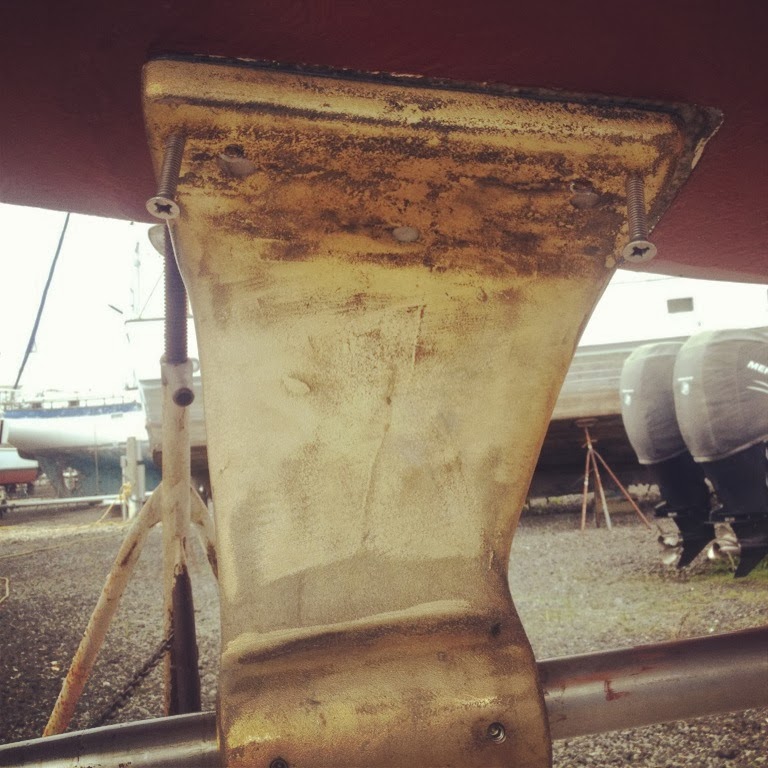
bottom job, Frank noticed several cracks that ran horizontally across it. This is the aperture that holds our second cutlass bearing that in turn holds our propeller shaft in place. As we all know with metal, a noticeable crack usually means severe corrosion, and we didn't want to risk having this fail on us. After freaking out and thinking about what the heck to do with this, we started to do some research on how to get this piece re-made. We had considered both braising and TIG welding as a way to repair it, but quickly ruled that out after talking to a few local welders. This left us with having to get a new piece cast, as the old one was not an off-the-shelf part. Most of the foundries we looked into had a lead time of 12-14 weeks. We were a little disgruntled to think that this final and unexpected piece of the puzzle would keep us on the hard for an extra 3 to 4 months. After calling every place we thought would be an option, we found one over in Washington that promised to custom cast it with a 2 week lead time. The price for this including the tooling and new cutlass bearing, surprisingly, was comparable to getting a new off-the-shelf prop (maybe they didn't realize that it was going on a boat and forgot about the 200% marine grade upcharge).
 |
| Original strut |
 |
| Cracks :( |
Frank wanted to remove the strut without having to pull the shaft. We were told by people at the yard that this was not possible, and since Frank is super stubborn he wanted to prove that, indeed, it could be done. After rigging up ratchet straps to pull it off, as well as heat guns to heat up the caulking, he was finally able to get it off with the help of a paint scraper and a hammer. After removing it from the boat, it was a matter of shipping it over to
Morel Industries in Seattle, WA. The strut weighed a hefty 50 lbs. We chose Morel Industries not just for its quick turnaround times, but also because of their reputation as a competent foundry (they are responsible for casting the pieces required to make the tight rope that
Nik Wallenda recently used to cross the Grand Canyon.) The foundry used sand casting to replicate the old part we had sent to them. It took 4 weeks to get the new part (one week each way to ship) complete with a new cutlass bearing pre-installed. Even though the new part was as close to an exact replica as could be made, subtle differences still occur due to shrinkage during the cooling process.
 |
| Ratchet straps to help get it off |
 |
| Hammering away with a paint scraper |
 |
| Finally off |
The new piece needed to be properly aligned before it could be bolted back on the boat. This is the fifth job we've hired out as the precision needed to align the piece was not something Frank was comfortable tackling on his own. John, at the yard, was responsible for doing this work. He first had to get the shaft to sit straight where it wants to sit without the droop caused by its own weight. To accomplish this, he took the length protruding from the boat multiplied by the known weight per inch for a 1 1/2" shaft. He then took this number and divided it in half. With that, he knew how much force had to be applied to the aft end of the shaft to get it to sit dead straight. Once that was accomplished, he then had to align the strut to the shaft and the boat. He first buttered up the strut and the boat with thickened epoxy. While it was still wet, he screwed 4 screws (one on each corner of the strut) through the strut and up into the hull. He was able to use these screws, by tightening and loosening them, to align the strut to the shaft, the way you would align an engine. When it was properly aligned, he let it sit until the epoxy had fully cured. Once it was all dry, the adjustment screws were removed and the 6 bolt holes were cleared of the excess epoxy. We used silicone bronze bolts to firmly secure the strut into place for good, as the old bolts were stainless, and stainless steel and bronze do not play well together underwater.
 |
| Alignment screws |
 |
| Installed |
Now that this is finally installed, it is just a matter of sandblasting it along with the shaft and propeller before applying 4 coats of Interlux 2000, followed by 3 coats of a hard (non-abletive) bottom paint to keep it all from fouling.


No comments:
Post a Comment