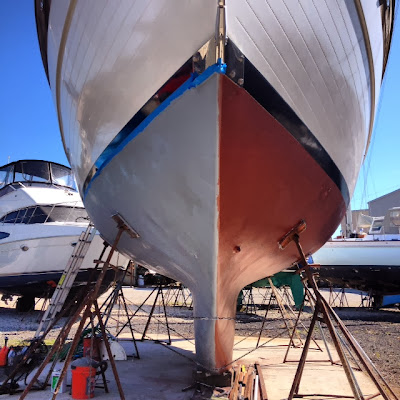
Friday, November 29, 2013

Strut Your Stuff

In the process of cleaning off the strut to be bottom painted during our bottom job, Frank noticed several cracks that ran horizontally across it.  This is the aperture that holds our second cutlass bearing that in turn holds our propeller shaft in place.  As we all know with metal, a noticeable crack usually means severe corrosion, and we didn't want to risk having this fail on us.  After freaking out and thinking about what the heck to do with this, we started to do some research on how to get this piece re-made.  We had considered both braising and TIG welding as a way to repair it, but quickly ruled that out after talking to a few local welders.  This left us with having to get a new piece cast, as the old one was not an off-the-shelf part.  Most of the foundries we looked into had a lead time of 12-14 weeks.  We were a little disgruntled to think that this final and unexpected piece of the puzzle would keep us on the hard for an extra 3 to 4 months.  After calling every place we thought would be an option, we found one over in Washington that promised to custom cast it with a 2 week lead time. The price for this including the tooling and new cutlass bearing, surprisingly, was comparable to getting a new off-the-shelf prop (maybe they didn't realize that it was going on a boat and forgot about the 200% marine grade upcharge).  

Original strut
Cracks :(

Frank wanted to remove the strut without having to pull the shaft.  We were told by people at the yard that this was not possible, and since Frank is super stubborn he wanted to prove that, indeed, it could be done.  After rigging up ratchet straps to pull it off, as well as heat guns to heat up the caulking, he was finally able to get it off with the help of a paint scraper and a hammer.  After removing it from the boat, it was a matter of shipping it over to Morel Industries in Seattle, WA.  The strut weighed a hefty 50 lbs.  We chose Morel Industries not just for its quick turnaround times, but also because of their reputation as a competent foundry (they are responsible for casting the pieces required to make the tight rope that Nik Wallenda recently used to cross the Grand Canyon.)  The foundry used sand casting to replicate the old part we had sent to them.  It took 4 weeks to get the new part (one week each way to ship) complete with a new cutlass bearing pre-installed.  Even though the new part was as close to an exact replica as could be made, subtle differences still occur due to shrinkage during the cooling process.

Ratchet straps to help get it off
Hammering away with a paint scraper
Finally off

The new piece needed to be properly aligned before it could be bolted back on the boat.  This is the fifth job we've hired out as the precision needed to align the piece was not something Frank was comfortable tackling on his own.  John, at the yard, was responsible for doing this work.  He first had to get the shaft to sit straight where it wants to sit without the droop caused by its own weight.  To accomplish this, he took the length protruding from the boat multiplied by the known weight per inch for a 1 1/2" shaft.  He then took this number and divided it in half.  With that, he knew how much force had to be applied to the aft end of the shaft to get it to sit dead straight.  Once that was accomplished, he then had to align the strut to the shaft and the boat.  He first buttered up the strut and the boat with thickened epoxy.  While it was still wet, he screwed 4 screws (one on each corner of the strut) through the strut and up into the hull.  He was able to use these screws, by tightening and loosening them, to align the strut to the shaft, the way you would align an engine.  When it was properly aligned, he let it sit until the epoxy had fully cured.  Once it was all dry, the adjustment screws were removed and the 6 bolt holes were cleared of the excess epoxy.  We used silicone bronze bolts to firmly secure the strut into place for good, as the old bolts were stainless, and stainless steel and bronze do not play well together underwater.

Alignment screws
Installed
Now that this is finally installed, it is just a matter of sandblasting it along with the shaft and propeller before applying 4 coats of Interlux 2000, followed by 3 coats of a hard (non-abletive) bottom paint to keep it all from fouling.  

Thursday, November 28, 2013

Happy Thanukkah!

Happy Hanukkah and Thanksgiving!


Since I'm working all Thanksgiving weekend, my good/only friend here in St Augustine and I made dinner a day early so that we can still feast.  After 5 solid hours with just the two of us cooking, our spread included an 18lb turkey, sausage stuffing, bacon brussel sprouts, roasted squash, roasted sun chokes (roots of a sunflower that taste like artichokes), sautéed broccolini, home-made cranberry sauce, pecan crusted  brown sugar mashed sweet potatoes, regular mashed potatoes, and homemade cheese biscuits.  Plenty of food for the four of us ;P  Yum.

Monday, November 25, 2013

Steer Clear

With a lot of our on-the-hard projects coming to a close, we've been taking the time to reflect on everything that we have done to Moitessier.  One of the more annoying projects that I'd consider the embodiment of the Rule of Three's involves the rudder shaft packing gland.  Some months ago, Frank went to replace the hose on our rudder shaft packing gland and repack at the same time. This simple project led to an onslaught (as usual) of other projects that we had not planned on undertaking.  To get to this area, our steering quadrant had to be removed, as well as the rudder bearing.  When he went to do this, he had discovered that the bearing on the rudder shaft had seized.  No matter how hard he tried, with liberal amounts of PB Blaster and brut force, this stubborn bearing was not going out without a fight.  After a frustrating few days in our "clubhouse" Frank finally decided that it needed to be cut out.  He was dreading having to do it this way as it meant using an angle grinder inches from his face while pretending to be a contortionist, but after an uncomfortable few hours, he finally managed to get it off.   After this fun debacle, he discovered that the plate that the bearing mounts on had also shat the bed.  Though it was stainless steel, it had still corroded to the point of needing replacement (yay to stainless steel on Hans Christians!), so that was another project added to our list that I will not bore you with.  From there, we bought a new bearing, which of course needed to be reamed out so it would fit properly back onto the rudder shaft as our shaft is neither metric or standard!  This was no small feat and was very discouraging as we couldn't figure out how this could be done accurately.  Since the collar of the bearing is made out of hardened stainless steel, no machine shop wanted to touch it as it would've required extensive hours of labor if it even could be done.  Now we're not talking about a huge difference here, simply a couple thousandths of an inch, just enough to make it not fit.  We had thought about heating the bearing and packing the shaft in dry ice.  This would've allowed us to temporarily enlarge the bearing and shrink the shaft, but it would've also meant that once the bearing was on and in place, with the temperatures equalized, that we would once again not be able to get it off without destroying it. Grrrrr.  We tried a Barry Hone, normally used to enlarge cylinders in engines, to no avail.  Eventually, we were able to find a friend at the yard who had a friend that specialized in rebuilding engines who was willing to give it shot.  He used a machine normally used for cutting engine cam shafts (also hardened steel) to get the job done.  This was a serendipitous twist of fate as Frank had only mentioned our dilemma to our friend in passing (thank you Darrell).

Old setup.  Note the "modified" cable attachment (welded on
L brackets)..  Apparently we aren't the only ones to
take issue with Edson's design 
New bearing and plate.  Old rudder stops
New rudder stops
New steering cable attachments
With this accomplished, we were finally able to get to the packing gland and do what we had originally planned on doing, which was to inspect the rudder shaft, replace the damn hose, and repack it!  While Frank was in that area, he had discovered that our radial drive had a large crack in it.  This was very alarming as this is the quadrant that steers our boat, and failure of this component would mean no steerage…:(  Upon looking around, we realized like most things on the boat, this steering system was ghetto rigged and hooked up improperly.  The stress crack that had formed was due to it having forces on it that it was not designed for.  So another expense and frustrating project was added to our list.  We worked with Edson, which was the same company that had made our first quadrant.  After discussing with a representative what we needed and giving him the information on our rudder shaft size and shape, a new one was on its way within a matter of a couple of weeks. That project was finally buttoned up a few weeks ago, with an aggravating few days of me in the clubhouse tightening and loosening nuts repeatedly and Frank atop fitting the radial drive on properly so that we could measure, cut, and install the steering cables.  What looked to be another straight forward project was complicated by the need to rethink the existing design.  Since it was installed improperly the first time, Frank had to start at square one with the new drive. What we originally had as "stoppers" were dinky little wooden squares that were used to stop the drive from continuing to turn when the rudder was hard over.  We decided that these were not beefy enough and made new ones by epoxying pieces of solid oak together to create hefty wooden blocks standing about 5" high.  After building these, it was a matter of fitting the drive on, and bolting the blocks into place.  This again was a challenge as the design of the radial drive was utterly asinine. It's hard to explain the design flaw, but because of the way it's cast,  basically it only allowed for an inch of adjustment on the steering cables.  Also, the way the cables were designed to be threaded through, it lead out to the bottom of the radial drive, and on our boat this meant only about 6"of space reaching at arms length wile upside-down.  We had thought about flipping it the other way around, but the space constraints on  Moitessier did not allow for that to be an option.  Had Edson enabled the wires to threaded through on either side of the drive rather than just one, we could've measured, cut, and adjusted them from the top within a matter of 20 minutes tops.  But since they didn't, it took us 2 solid days to disassemble, remeasure, re-cut, reassemble, disassemble, you get the picture.  Stupid, stupid, stupid!  Had someone thought this through a little better or had to actually install their design on a real live boat, I'm sure it would've been made differently.  And by differently, I mean correctly.   However I know by now that that may be simply too much to ask for…

Old Radial Drive.  Notice the crack highlighted
in red.  The steering cables are attached differently
than the new one as they were "modified".
New Radial Drive 
New set up
Notice the small space under the drive
Of course, 9 out of every 10 bolts that were removed broke.
And finally, new hose on the packing gland with proper hose clamps

Monday, November 18, 2013

Getting Turned On...

We have been waiting for this day since July 2012.  We finally turned on our brand spankin' new Yanmar.  We wanted to wait until we were closer to splashing before we buttoned up the engine project.  Mostly this was because we wanted to make sure that our fuel was polished before we turned the engine on for the first time.  We also didn't want to get it polished and have the fuel sit in the tanks, unused, for a year before we completed the rest of our ongoing projects.  As our to-splash to-do list is getting shorter and shorter, it was time.  We hired David Darby from Micro Clean last week to come polish the fuel and clean out the tanks.  As far we know, the fuel has been sitting in the tanks for at least 5-6 years, and there was no way in hell we were going to feed that to our new baby.  Some of our diesel had turned back into asphalt, and the filters that started off crisp and white began to quickly look like brown cardboard.  Dave was nice to enough to give us 30 days, after cleaning, to establish whether or not our fuel was even going to still be good, and deal with the removal if it turned out not to be.  Refineries give a 6 months shelf life for diesel, ours was 10 times that old :(

Fuel polishing setup
A dirty filter. These start off stark white
With the fuel cleaned, it was finally time to start bleeding the lines.  This was made slightly more complicated as we have 3 separate tanks that lead to a selector manifold that then leads to a primary fuel filter.  The trick was to get ALL the air out of the lines as well as the manifold.  Frank did this by turning one tank on, actuating the lift pump until the primary fuel filter was filled and all air was out; then shutting off that tank, draining the filter, and repeating that process to the 2 remaining tanks.  It was then on to bleeding the engine itself.  Compared to our old Perkins 4108 from our last boat, this was a breeze.   Yanmar 4JH4-TE has only one bleed point on the low side, and the high side is self-purging.  Simple.  Crack the one bleed point, actuate the lift pump until there is a clean flow of fuel with no bubbles, re-tighten the nut, and Voila!  Since the engine has never been run, it's important to crank it over for 5 seconds or so, without starting it, to distribute oil throughout the engine.  We did this by holding the stop level on the governor to its off position and cranking.  After this was done, we did a quick pre-heat with the glow plugs, held our breath, turned the key to start, and put-put-ROAR.  That's right, only two "puts" and our baby purrs like a kitten.  IT'S ALIVE…..IT'S ALIVE!!

Maning the bucket
Exhaust water
Normally marine-diesel engines are cooled by cycling raw salt water (from a thru-hull) through the heat exchanger.  This presented an obvious problem, as we are on the hard.  We've heard of people shoving a hose into the sea-cock, but didn't like this idea as there is no way to tell that the engine is getting adequate water flow and not air.  We chose to run a hose from the inlet on the engine, into a bucket that was filled with water fed by a garden hose.  This allowed us to monitor the intake of water from the engine, and ensure there was a constant flow without it sucking air.  After starting it up, we ran out to check and see that the exhaust was pumping water properly, and that there was no smoke.  We then went on to check the panel to see if all was right, and of course, thats when our daily dose of humility was fed to us.  The tachometer was not registering…boooooo!  Frank will trouble shoot that later today and figure out why.  Other than that, it has been a very exciting day for us.

Saturday, November 16, 2013

Bottoms Up

Right before we went to St Petersburg, we had finished doing the bottom job.  In a previous post, I had mentioned that Frank had gotten the bottom down to bare glass.  This was because we wanted to slap on a new barrier coat as the old one had failed.  We used Interlux Interprotect 2000 as the barrier coat.  It took 8 gallons, with one gallon being used on each side per coat, this gave us a total of 4 coats.  We alternated between white and gray to ensure full coverage of each coat.   Interprotect 2000 is super easy to use even though it's a 2-part system.  There is no sanding required between coats (up to 6 months), and overcoat time is nice and short, allowing us to get all the coats done in 2 days.  This meant that we were able to get 3 coats on the first day and the final coat of barrier as well as the first coat of anti-fouling the 2nd day. The first coat of antifouling paint has to go on while the last coat of Interprotect is still tacky.  Interlux was nice enough to put a suggested schedule on the box, to help with timing, which we roughly followed.  Because of the size of the surface area that we were painting, by the time we finished with one coat, it was time to mix the paint, wait 20 minutes (induction time), and go right into the next coat.  Frank was the painter, and I helped to spot and mix paint.  A quick tip when doing this is, invest in the more expensive roller holder and pans. The cheap ones fell apart halfway through our first coat!!  

First it turns white...
Next up, grey….
Lunch break with clean gloves on 
White again...
For our bottom paint, we used 5 gallons of International Interspeed 640 that we were able to get for $250 total at Sailor's Exchange here in town.  For those not familiar with bottom paint costs, a single gallon of Interlux Micron CSC from West Marine, which is a close comparison to Interspeed 640, will run you $225.  This comes out to a $875 saving in bottom paint alone.  We were lucky enough to score some before they sold out as you can imagine it goes quickly when they get it in stock. They are able to sell it at such a low cost as they buy the surplus from large jobs on US Navy ships and large cargo tankers.  It is an industrial product that is not usually sold to the general public as it is exceptionally toxic to work with.  Fun… We have talked with a bunch of other boaters that have used Interspeed and hear that they average 3-4 years with 2 coats before having to reapply.  Since we didn't want to store the extra paint, we just went ahead and used all 5 gallons, which gave us just about 3 coats. We will have to wait and see how long it holds up.  

Tough job….
Final  coat of grey, immediately followed by anti-fouling

Thursday, November 7, 2013

Mackerel Skies


I must say that St Augustine has the most beautiful skies…

From our bed

Monday, November 4, 2013

In the Buff


Shortly after Frank got the barrier coat off the bottom, we hired out our top sides to be buffed and waxed.  The gel coat on Moitessier was looking a bit dull and we were concerned that if we let it go any further that it would not be savable.  We had been going back and forth about whether or not we should do this on our own, but after getting a reasonable quote, we had decided to just hire it out and save Frank from sore shoulders (He suffers from an injury in his rotator cuffs from his skateboarding days as a teenager). We figured it would be cheaper to hire it out than to have Frank injure himself further and have to endure surgery. The guys we hired out from Billitz Boat Detailing did an incredible job.  Emil, the owner of the company, has been in the business for over 25 years.

Before Buff Job.  Moitessier is sad :(

He started by cleaning the hull sides with On & Off to get off any stains and contaminants. 3 test spots were done to show us the different products and methods and see which ones would give us optimal results.  He then compounded it with a rubbing compound that takes off the oxidized gel goat and makes a smooth shiny surface.  Next, he waxed the boat with Garry's Royal Satin One-Step Cleaner Wax to help protect it from UV rays as well adding a little extra shine.  I must say, he did a better job than Frank would've, in a shorter amount of time too, as Frank had done a small portion at the bow of the boat a while back just to see what he was potentially in store for.  It really has transformed the look of the boat and it has been 1 of only 5 jobs that we have hired out. I think this time it was well worth the money because not only is the boat super shiny, but we didn't have the scaffolding, only a ladder that Frank would've had to balance on and move every half a foot.  I think that if we did have the necessary means to do it, Frank would've for sure tackled the job on his own, injured shoulder or not, as he is truly a stubborn bastard.   I didn't think Moitessier could be any more beautiful than she already was. We are so pleased that we are going to get a quote for our cabin tops as well. Hopefully we will get that done once we splash.  

Test Panels on Port side (SB side is done).  See the difference?
Emil buffing away
Look how shiny!
We tackled the boot stripe during this period of time as well. We used Interlux Brightside Polyurethane paint which was a single part paint that was relatively easy to work with.  It's a bit thicker than Awlgrip, but all in all, a relatively straightforward paint job that required the usual sanding, cleaning, and taping cycle.  We changed the color from the original green to a bad-ass black, which I think goes better with our natural wood colors and soon-to-be Toast colored Sunbrella.

Frank painting our boot stripe
Boot-stripe and buffing done